All New Sonoff Basic R3
July 25, 2019 · Jason Marriott
For less than R120 the original Sonoff Basic changed IOT and made Smart Home affordable and easy to do, but their latest Sonoff basic R3 changes the game entirely! This article will explain how to flash the New Sonoff Basic R3 and also provide an instructional tutorial as to how to flash Tasmota to the Sonoff basic R3 OTA (Over The Air) by putting it into DIY mode without having to solder 😊 or buy other components.
If like me you're a fan of Home Assistant this unit has just made life far easier! As a Google Home or Amazon Alexa device this works straight out the box!
BUY THIS SWITCH:
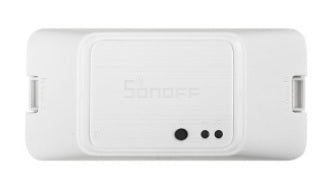
Eiferer: Sonoff Basic R3
Instructions:
- Please read through everything first before going ahead, once you flash this device that’s it.
- To get started I would suggest downloading the following:
DIY TOOL from github
TASMOTA Download Sonoff.bin 6.3.0 is the newest and works 😊
Tasmota Software
- You going to upgrade the device firmware v3.1.0 or above in ewelink.
- Disconnect Power from the Sonoff device, so you don't kill yourself!.
- Put jumper (find this in the plastic bag) on the two pins that are sticking up on the circuit board. BE CAREFUL SNAPPING THE PLASTIC BUTTON IS REALLY EASY ☹, YOU GOING TO NEED A STEADY HAND TO GLUE IT BACK TOGETHER
- Connect your laptop and the Sonoff Basic R3 to each other by using the following method:
- Create a mobile hotspot on your phone with the following details:
- AP name: sonoffDiy
- Password: 20170618sn
- Power the Sonoff Basic R3 back on and it will automatically connect, you'll know it's connected your phone shows that there is a "device connected"
- Connect to the same hotspot on your wireless laptop. This completes the circle you require to move forward 😊
- Extract the Sonoff tools and launch the "DIY tool", you will see your Sonoff Basic R3 listed and you will be able to control it with the tool on your computer.
- You can use the DIY tool to upload the Tasmota bin file that you downloaded in step 2
- This is no longer a Sonoff device, it is now a Tasmota device! BUT, it is not yet connected to your Wifi network and needs to be told your Wifi details. You can access the Tasmota device to configure it by connecting to it's Wifi network, Sonoff-xxxx.
- Program in your usual Wifi details for your router and Tasmota will join your local network
- To access Tasmota device from a computer on your network you will need to find the IP address, you can do this using fing or by looking in your router’s config pages.
- You can now configure Tasmota for MQTT or HTTP.